How To Pay Off College Loans Faster

Even though my little blog is in the middle of a gardening series, I’d like to take a side step for a moment and continue down this financial rabbit hole.  To all my gardening readers, I promise I have really great, green and dirt-under-your-fingernails posts lined up!!  As a matter of fact, what really got me started talking about money is how I intend to use my up-coming, first-ever vegetable garden this spring to help decrease my grocery bill.  And as I will be composting, I’ll be saving money on all the waste management products (like trash bags!) we use as well! AND it is tax season so if there is a time to talk about money, it better be now…

In my first financial article I listed 20 ways this stay at home mama saves and thrifts!  Right now I want to spend time talking about number 14 on that list:

Make paying off debt your number one priority.  

Thankfully, Keith and I have always believed in staying as debt free as possible and we’ve organized our lives to maintain that value.  We’ve only bought used cars so we’ve never had a car payment.  We chose apartments that were at or below our budget which came with most of the utilities included in the rent.  Our credit cards have never come anywhere near the credit line and are always paid off (in full!) by the time they are due.  Also, when we rack up rewards points on our cards, we almost always use that free money to pay off the credit bill itself.  Literally, the only thing we have ever accrued interest on are our student loans… and it absolutely kills me!

HATE paying into my student loans.  I HATE that once Keith finally! graduated and started earning a career income it still! felt like we were just scraping by.  And I HATE the idea that if all I ever make are the minimum payments then I could be paying back these loans for 10 + years and practically double some of them because of interest!  If you’ve got student debt out the wazoo or can relate to my very heated sentiment, then maybe you should try our method for paying off debt faster.


Step One:  Go through your budget with a fine tooth comb and look for any areas that you might be overspending.  Try to find as much extra cash as possible because whatever you don’t need to spend (like rent money) can go toward your loans.

Step Two:  Now that you’ve decided how much extra money you can afford to pay toward loans, pull up all your loan information.  Make a list of your loans starting with the highest balance/interest rate down to the lowest balance/interest rate.  For example:

$2,000 – 6.5%
$1,500 – 6.5%
$3,500 – 3.15%  (Why is the highest balance this far down the list?  Because it has a lower interest rate than those above it.)
$900 – 3.15%

Step Three:  Using this method you will make your extra payment to one loan at a time.  When Keith first explained this I was tempted to put the extra money toward our lowest balance loan first, regardless of interest, because I thought that getting rid of one loan was equal to getting rid of any other.  However, it is not.  If you pay off your smaller interest rate loans first then you will be spending more money in the long run on interest.  Similarly, if you put a little bit extra toward all loans at once, you will also be paying more toward your interest in the long run.  Anything that extends the life of your larger interest rate loans, even if it is by a hair, is costing you money in accrued interest!  So find your largest balance with the largest interest rate and make your extra payment toward that loan until it is paid off.  While making this extra payment, continue paying the minimum to all other loans.  If we continue to use our example loans, a monthly payment history would look like this:

A                  B                 C
$2,000        6.5%         $250  (That’s $200 extra plus the pre-existing $50 min.)
$1,500         6.5%         $50

And so on with column being the loan, being the interest rate, and being your monthly payments.

Step Four:  By this time you should have paid off your largest balance/largest interest rate loan.  Now, take however much you were paying toward it (lets say $200) and add that amount to what you are already paying toward your next highest balance/highest interest rate loan.  Meaning, if you were paying $50 a month to your next highest loan, you will not pay $200 toward it, you will pay $250.  Extra payment + pre-existing monthly payment = new monthly payment.  Make this payment until your next highest loan is paid off.

Step Five:  Repeat step four for all remaining loans in your list from highest balance/highest interest rate to lowest balance/lowest interest rate.


This method starts out slow but once it picks up, it really has steam!!  I graphed out all of our loans and applied this method to give myself an estimate date of when our last loan will be paid off and these were my results:

We’ll pay off 1 loan in 2015.
Another in 2016, two more in 2017, an additional 3 in 2018, and our last 3 in 2019!

Before we really knuckled down and committed to this method it took us 2 YEARS to pay off our first loan. But by snowballing our payments we’ll be able to pay off 3 in a year and 10  loans in 5 years!  Not to mention that this is just my rough estimate and I rounded any number with a remainder.  Meaning that there will be months when our extra payment will exceed the loan amount!  I’ve been feeling pretty bummed out lately, thinking we’ll never get out from under this debt, but I am happy I graphed it all out because these results are incredibly encouraging to me.


As a final piece of advice, if you took out loans using Sallie Mae (now called Navient) and want to use the method I described above, you will need to mail a check with the extra amount to Navient with a letter detailing how the amount is to be allocated.  Otherwise, if you make an extra payment online, it will be dispersed among all of your loans as Navient sees best.  Also, if you make a payment that is equal to or greater than your monthly minimum, Navient will advance that money toward your next months payment.

If you want to follow the method I have outlined here is a template for the letter you need to send every month with your check:

Navient Letter Template

Every Penny part II: Track Your Spending

I wrote a post before about how I try to stay as thrifty as possible to assuage my stay-at-home mom, doesn’t-bring-home-the-bacon guilt and I mentioned that a technique I’ve used before is to track my spending.

I rarely buy things for myself and whenever my husband or I do, we always spend within an agreed upon limit.  However, more times than not I am walking to the register with my thrifty purchase in hand feeling so guilty for spending money on myself when this $5, $10, $20 could be going to our savings or bills or loans.  Whenever we’ve gone over budget in the past I spend a good few days just blaming my selfish shopping because my (illogical and unreasonable) guilt always forces me to assume that the overage was from something I bought for myself.

Well, for the past 6 or so months we’ve been feeling the squeeze and wondering why it always feels like we are burning through our one income.  However, rather than just blame myself I decided to be proactive and take a month to track every last penny and what I found was shocking but also encouraging!  Also, since our little one joined the family we’ve never actually tried to reorganize our budget to fit her needs as well.

If your family has added a new member, you’ve taken on some new financial responsibility (like a new car or home), or you’ve never even given thought to tracking and budgeting I highly recommend you give this a try!  When I say I tracked every penny, I don’t mean I wrote down in detail every single purchase.  Instead I created general grouping for our purchases with little, slightly more detailed subheadings.  Here is the template we used:


College Loans:  Total (or any other debt besides mortgage and car payments)

Katie’s:  $
Keith’s:  $

House:  Total

Rent (or mortgage):  $
Phones (we use cell but include it here):  $
Internet: $
Electricity: $
Heating Oil: $ (We actually don’t spend on this monthly but if I continue this template for the rest of the year I’ll be able to generate a monthly average for our use and budget it into a savings accordingly)
Household products: $ (cleaning products, paper products, air fresheners, etc.)

For your tracker add any other utilities you pay like garbage, sewer, cable.

Car: Total

Insurance: $
Gas: $ (We have two cars and added gas for both for our tracker)
Maintenance: $ (We didn’t have any maintenance this month, thank goodness!)

Trip: Total

Gas: $ (Because we don’t go on trips every month I put the gas for it in a separate category.  By the way, a trip is anything that requires driving for more than an hour and you stay there all day or over night.)
Food: $
Tolls: $

Baby: Total

Clothes: $
Medicine: $
Food/Formula: $
Diapers/Wipes: $
Misc: $ (our misc. this month was a new high chair, pacifiers, sippy cups, and house safety because little miss has discovered what electric plugs are!)

Groceries: Total (This was any food item bought at a grocery store including snacks and impulse buys!) This is where we spent the most money so next month I am going to break it down further to see what groceries we are spending the most on meaning, Meat, Veg/Fruit, Dairy/Eggs, Breads, Boxed/Canned Items, and Pantry Staples.

Eating Out: Total (This included ANY type of fast food, including a $1 cup of coffee!!)  I was very happy to see that we stayed well within our eating out budget this month even though we went on a few dates!

Miscellaneous: Total

Clothes: $ (For us)
Craft Supplies: $
Garden Supplies: $

This category is where I put all our “selfish” buys.  This month I bought for myself a few blouses, some craft supplies (which were on sale!), and potting soil.  I was very happy to see that out of all the categories, I spent the least! on items purely for myself! 🙂

Income: How much money did you bring in this month?
Spending: And how much of it did you spend?


After looking over how much we spent we decided which numbers were unsustainable and adjusted them accordingly.  For example, if your family of two spent $300 on groceries for the month and in the past has gotten by on $150 but was uncomfortable, maybe try $200 or $250 for the next month as your budget.  Personally, we plan on setting a budget about $50-$75 lower than what we spent on food, we won’t be taking a trip this month or buying Autumn anything but food and diapering supplies, but out spending everywhere else was spot on.

I was very disappointed with our grocery spending.  I know we like to eat but I had no idea I let it get so out of hand.  This month we have set a budget and I am going to track our spending again in more detail.  Also, even though he never spends too much and it usually is on whole foods, sometimes Keith will buy a few groceries before he comes home from work and those little spontaneous trips can really add up!  So we are stopping that this month as well.

Even though I guilt over our personal spending and gripe about groceries, what really eats away at our income and sets back our saving goals really is our college loans.  Sometimes I look at Keith’s pay check and then at our bank statement and just think, “Where the hell is our money going!!!!”  It is so frustrating to work so hard and feel like there is no return.  Until I knuckled down and tracked every penny I truly thought we were just the most wasteful, spendthrifts imaginable!  But looking at the facts I see now that what is killing us are those stinking loans.

I shouldn’t let it upset me so much though because it is our conscious choice to pay extra in every month in an effort to save on interest and cut down the life of those buggers.  Unlike a mortgage which can be recouped and even profited from, this kind of debt is just a prison and if you owe to loans or credit cards I HIGHLY recommend budgeting yourself and making those payments (plus some!!)!

Oh, and one last little piece of advice.  If you have direct deposit, ask your employer if they can send a portion of your check to a savings account instead of to checking every month.  That way, after you’ve stuck to your monthly budget you won’t be tempted to do a little shopping with any left-over because the better portion of it will already be in savings!  We put 10% of everything Keith makes directly into the savings and never touch it.  I honestly forgot we were doing it until he brought it up the other day. Ha.

So if you’re interested in being a better penny pincher I hope my little template works out for you and happy budgeting!

Very Inspiring Blogger Award

very

Carley nominated me for the Very Inspiring Blogger Award.

When I first read her comment telling me she nominated me I literally snorted at the word inspiring thinking… me? Pfft.  Ha, I’m so random and my posts are so short and not even that original.  But after my little self deprecating moment I just felt so grateful for this woman whom I’ve never even met!  When absolutely no one is reading me for days suddenly Carley will like and comment almost all my posts and just pick my spirits right up!

The Award Rules for the Very Inspiring Blogger Award are:
1) The nominee shall display the respective logo on her/his blog and link to the blogger that has nominated her/him.
2) The nominee shall nominate ten (10) bloggers she/he admires, by linking to their blogs and informing them about the nomination

I started this blog to share about my experiences being pregnant for the first time and found Journey with Carley when she was writing about her pregnancy as well.  Through exchanging likes and comments and sending love and support I’d like to say this silly thing called blogging has helped me make a friend across the ocean.  If I could I’d nominate you ten times, Carley, but you’ll just have to settle for being my number one!  And I’ve already told you, but just a reminder, if we’re ever on the same continent – we’re getting all dolled up, leaving the kiddos at home, and hitting the pub!  So.

1. http://journeywithcarley.com/

Number two belongs to two people, one blog!  Inspiring, thoughtful, and provoking, two more friends I’d love to meet in the real world! David and Dagny from:

2. http://thereisanotherway.org/

The rest of my nominations go out to those individuals I might not be as close to in the blogging world but who challenge and inspire me none the less!  I appreciate each of you and all your work!

3. http://studiomothers.com/

4. http://whattohavefordinnertonight.com/

5. https://poemsandpoemes.wordpress.com/

6. http://doodlemum.com/

7. http://littlefallcreek.com/

8. https://insidethelifeofmoi.wordpress.com/

9. http://www.worldorganicnews.com/

10. https://mejfote.wordpress.com/

Saving Seeds

I was cutting open a butternut squash for dinner today and as I put the seeds and rind in my trash bowl I thought to myself, “Why don’t I save these?”  It’s just a butternut squash I bought on sale one day at the grocery store, intending to eat and forget.  However, this gardening series and the success my surprise garlic plant is having has really opened my eyes to all the potential my food has but I’ve been wasting.  Why should I buy butternut squash over and over again at the store when I can buy it once, plant it, and save the seeds every year to always have my own supply?  $.99 per lb. could be all I would ever have to pay for years of squash!

Seed saving is relatively easy and only costs the initial price of your vegetables.  Hey, you’re going to eat those veggies anyway, why not save the seeds and plant them this year, next year, or some seeds can even last between 6-40 years!!  There are a variety of ways to save seeds depending on the plant but for this post I want to focus on plants that bear their seeds inside the fruit.  For a more in depth look at seed saving check out this article.

For many fruits and vegetables all that is necessary to save seeds is to remove them from the fruit and leave them out to dry.  Once dry you can put them in a labeled envelope or dry container to save for when you are ready to plant.  Plants whose seeds are attached to membrane or pulp, like pumpkins or squash need to be washed and fermented before drying and storing.  For example, I scooped out the seeds of my butternut squash and rinsed away as much pulp from them as I could.  Now they are sitting in a mason jar of cold water.  Tomorrow I will scoop off any seeds and pulp that are floating on the top because that means they are hollow and won’t germinate.  Then I’ll rinse the seeds on the bottom of the jar and leave them out to dry on a paper towel or newspaper for a few days before storing them in a washed baby food jar.  (We’ve been buying Autumn Beech Nut baby food which comes in these great little glass jars that I am saving to repurpose as seed banks.)

I have a pantry along the stairwell to our basement which is always just above frigid and is the perfect place to ferment and store my seeds.  I poked my head in a minute ago and was very happy to see quite a number of seeds have fallen to the bottom. 🙂

Using a few vegetables that the first time gardener might plant, here are a few methods for harvesting and saving seeds:

Cucumbers & Tomatoes

1. Squeeze or spoon the seeds and pulp into a container like a mason jar.
2. Cover the seeds with water and swirl with a spoon.  Put on lid and place in a dry, cool area out of direct sunlight.
3. Swirl the seeds daily for 2-3 days and you will see that the pulp and bad seeds have floated to the top.  Skim those off and throw away.
4. Drain water and retrieve good seeds.  Place on a newspaper or paper towel for a few days to dry.  Flip them every day until dry.  If the paper gets very wet then replace it.
5. Put seeds in an envelope or glass jar with date and label.

Peppers

1. Cut pepper open and brush the seeds out of it.
2. Place on newspaper or plate to dry out for a few days and store in an envelope or mason jar.

For more information about how to save seeds for specific plants, check out this article.

Every Penny: Top 20 Ways This Stay at Home Mom Saves Money

Sometimes I feel guilty because I don’t work.  I work raising our daughter, cooking, cleaning, and helping to manage our finances but I don’t work in the bringing-home-a-pay-check sort of way.  When my Facebook news feeds are full of friends “doing it all” and making money through home businesses, their invitations to “join our team” hit me like a brick to the face.  I am absolutely not a salesman – no way, no how.  I am the anti-salesman.  If there is a way I can copy-cat, DIY, or buy for half price on Amazon… or simply live without a product – I am all about that!!

For a brief, guilt ridden moment I considered selling essential oils.  They seem to be all the rage and even mainstream medical research confirms their benefits in aiding health and wellness.  However, after looking over fact sheets and various companies my very next thought was… why don’t I just grow these herbs myself and have enough produce to supply a year’s worth of tinctures, teas, balms, and extracts?

sigh.  See what I mean?

So after a few days of pouting and shame I decided to give myself a little reminder and share my own financial advice!  This won’t make you bucket loads of cash but it’s helped us to never feel wanting, to never think twice about bills or rent, and given us the ability to make extra payments toward our college loans.

  1. For those of you who are married: Combine your finances.
    There is no reason in marriage for each partner to have their own savings and checking accounts.  It doesn’t matter where the pay check comes from because you are both working at life together!  Stop calling the money, mine and yours; it has become ours.  This will force you to consider your family’s and partner’s needs before your own when you want to buy that bigger TV.  Even when I was making a pay check, Keith and I have always discussed large purchases with each other before hand.  Because we’ve never held a “it’s my money, I can do what I want with it” attitude, we’ve never felt bitter about asking permission to use it for little personal comforts.
  2. Track your spending and create a reasonable budget.
    Budget wisely.  Don’t budget $100 for groceries for the month only to feel guilty when you actually needed $200.  Many banks now have online financial trackers that will show you exactly where your money is going – look back at the last few months, are there areas of spending you could live without or limit?
  3. Discuss big purchases before you make them.
    This has to do with those personal comforts I mentioned and requires you set a limit for what a “big” purchase is.  It can be anything over $100 (that’s $100 for one item, not a collection of items) or for us it is any electronic purchase as they always seem to be a bit on the expensive side.
  4. Shop sales, shop locally, and price compare.
    Try to never pay full price for anything and shop at local farmer’s markets before going to big box stores.  Usually they have better prices, better products, and buying locally helps boost the local economy.  Also, price compare.  My favorite bread at Walmart is always about $.30 cheaper than at the grocery store but I NEVER see it go on sale at Walmart whereas my local grocer often puts it out for buy one get one free.
  5. Learn how to freeze foods.
    We don’t eat enough English muffins to warrant ever buying three at a time – except when they are buy one get two free in which case we eat one and freeze the others for later use.  If you’ve ever made too much food and know your family won’t eat the left overs, freeze them and reheat for a quick meal some other time.
  6. Pick your own fruits.
    Many farms offer a lowered price for picking your own fruit versus buying it off the shelf so take advantage of this fun money saver.  On a sunny day, picking blueberries is a fun family outing and we always pick enough to freeze and eat all winter long when fruit prices sky rocket!  This year we froze 18 quart sized bags of blueberries, 20 quarts of strawberries, and were given 7 quarts of frozen peaches from our in-laws.  You can’t beat a delicious fruit smoothie in the dead of winter.  Also, if you can forage for berries, do so!  We live near a state park that has a trove! of wild huckleberry bushes we pick from in season.*
  7. Reuse and repurpose.
    If you have a need, look around your house and see if there is anything you can reuse or repurpose to help you troubleshoot the problem.  I say this, though, with a grain of salt because if your problem requires a specific tool or part and repurposing something else is only going to aggravate the issue in the future – then spend the money now to fix it properly rather than doing a patch job that will cost you in the future.  I reused some old juice cartons from the recycling to plant my garlic sprouts in rather than buying planting pots from the store.
  8. Buy used and buy quality.
    Used items are cheaper, plain and simple, but that doesn’t mean you have to settle for something someone’s dog chewed up.  Wait for a quality item which you won’t have to replace in a month’s time.  If you can fix it up and make it quality without paying the initial price of the unused item, then do so.
  9. Limit your personal spending.
    Based on your budget, set yourself an allowance for personal items and don’t go over it.  Also, just try to buy fewer personal items!  Do you really need to visit Kohl’s very month?  How much clothing do you need?!
  10. Cancel or do not sign up for cable.
    We have never had television.  In our area there is only one cable provider and they charge an exorbitant amount but even so – TV will rot your brain anyway so save money and read a free library book, play with your children, or start a garden!  If you can’t live without shows then use Netflix or Amazon prime which are cheaper and don’t have those annoying commercials.
  11. Do not upgrade your phones!
    If your pricey smart phone is working perfectly fine, why are you going to pay for an upgrade?  If they didn’t come out with the swankier version would you still be dissatisfied with the phone you have?  Then you don’t need a new one.  Also, if you don’t have text and picture mail or a smart phone… then don’t get it!  Right now you don’t know how awesome all those things are but if you get any of them you’ll figure it out and won’t want to go back to saving money.  Stay ignorant, stay cheap!
  12. The only thing you should finance is a HOUSE.
    Pretty self-explanatory.  Don’t spend money you don’t have.  Which is also the reasoning for our next point.
  13. Use your credit card like a debit.
    I hate it when adults tell their children that credit cards are for emergencies.  No.  Your savings account or secondary savings account is for emergencies.  Credit cards should be used like debit cards – (again) do not spend money you don’t have.  We use our credit cards for every purchase we make because we know that when the bill comes we’ll have the money ready to pay it all back immediately.  Also, using a card like this helps us rack up rewards points which we can put back toward our bill.  AND! With both of our cards we earn 5% cash back for groceries, gas, and eating out and 1% everywhere else.
  14. Make paying off debt your number one priority.
    Making one extra payment a year on a mortgage significantly lowers interest and the life of the loan.  For college debt, choose one loan at a time (start with the highest interest rates) and put extra money toward it every month.  Then when that loan is paid off, take the principle you were paying, plus the extra, and put it toward the next loan.  For example, I will put $100 extra toward my 6.5% loan that only requires I pay $75 a month.  When that loan is paid off I take the total $175 and put it toward my next highest interest rate loan and so on.  This method is known as snowballing and is helping us pay off our collective college debt in 3-5 years on ONE income!  Finally, do not make any life decisions that would hinder you from making extra payments toward your debt.  For example, if you have college debt and are in the market to buy a house, set a price point that would still enable you to put extra toward your loans.
  15. Put money in your savings.  And don’t touch it!!
    If you are dipping your fingers into savings every month then you need to reevaluate your expenses!  It doesn’t matter if you put in $500 or $50, put something in your savings account; it is your emergency fund for life’s inevitable break downs.
  16. Vacation wisely.
    Dealing with money is stressful so go take a vacation!  Seriously!  But do it wisely.  Set a budget and don’t go over it.  Plan it months in advance so you can start putting money into savings for it.  Go some place in the off-season; it will be cheaper and less crowded.  Do not stay in hotels – the rooms are expensive and you will have to eat out every night.  Rent a house with friends or family members and take turns making meals.  Find as many FREE things to do at your vacation destination as possible.  Pick a place within driving distance – that means the gas and tolls will be significantly lower than the cost of flying.
  17. Cook at home as often as possible and “Date” at home too.
    Eating out is unhealthy and expensive.  The food is so delicious because it is full of artery choking carbohydrates, salt, and sugar!  If you’re craving your favorite menu item, try to copy cat it at home first.  Like this recipe which copy cats Olive Garden’s Zuppe Toscana.  Or if you really aren’t in the mood to cook and just need that fix, order out and eat it at home – this saves you from the temptation of dessert and needing to pay tip.  If a date night is what you need then send the kiddies to Gran’s house and order in or make something for yourselves!  Here are the top 20 stay at home date night ideas. 
  18. My favorite: Don’t shop when you are hungry.
    Sounds silly, I know, but my mom gave me this advice when I got married and boy was she right.  I never did much grocery shopping before marriage and if I go to that store hungry… MAN! Everything looks good!  Eat a granola bar first if you have to but DO NOT SHOP HUNGRY. 😉
  19. Only shop the outer edges of the grocery store and buy store brand.
    Unless you grocery shop at Walmart, almost every grocery store is set up the same.  Around the edges are Vegetables/Fruit, Meat, Dairy/Frozen, and Breads.  These are not only your healthiest dietary choices, they are the least expensive.  Once you start shopping in the isles you are paying for processed, packaged, and preserved flim-flam that you don’t need.  We only shop four isles: Vinegar/Baby food, Oil/Spices, cereal, and the International isle because Goya canned goods are usually less expensive and we really love making curries!  Although, even in those isles we only buy items which are on sale or we buy the store brand.
  20. Don’t buy soda, iced teas, or sports drinks.
    Not only are they loaded with sugar and caffeine, they are very expensive!  Make the healthier choice and drink water or make your own herbal iced tea with honey.

I could go on but these are the main ways we’ve been able to save money and scrimped together a savings.  This month I actually kept every receipt and tracked every penny we spent.  Let me tell you – I can not WAIT till this child goes on regular milk because formula is absolutely killing me!  Unfortunately I stopped producing milk around 7 months so we’ve had to resort to formula and even though we buy store brand – this booger drinks it like it’s free!!

A few other money savings techniques I’m planning on trying out in the coming months are baking my own bread, canning homemade sauces and condiments from the vegetables in our garden, and looking into making my own baby wipes.  I’m not much of a baker so cross your fingers for me and say a prayer because we might be looking at a lot of loaves de sawdust before I make an edible bread.

All of these points aside, our general principle when approaching money is to live within our means.  We’ve found a comfortable lifestyle that meets our needs without giving in to unnecessary wants.  I believe that our mindset is one everyone can achieve:  There are things we would appreciate if we had them but there is nothing we want which we cannot afford.  Meaning, we don’t waste our time pining after material possessions that do not fit our budget.


“Therefore I tell you, do not worry about your life, what you will eat or drink; or about your body, what you will wear. Is not life more than food, and the body more than clothes? Look at the birds of the air; they do not sow or reap or store away in barns, and yet your heavenly Father feeds them. Are you not much more valuable than they? Can any one of you by worrying add a single hour to your life?

“And why do you worry about clothes? See how the flowers of the field grow. They do not labor or spin.  Yet I tell you that not even Solomon in all his splendor was dressed like one of these.  If that is how God clothes the grass of the field, which is here today and tomorrow is thrown into the fire, will he not much more clothe you—you of little faith?  So do not worry, saying, ‘What shall we eat?’ or ‘What shall we drink?’ or ‘What shall we wear?’  For the pagans run after all these things, and your heavenly Father knows that you need them.  But seek first his kingdom and his righteousness, and all these things will be given to you as well.  Therefore do not worry about tomorrow, for tomorrow will worry about itself. Each day has enough trouble of its own.”  Matthew 6:25-34


Even though the current focus of this blog is gardening, the bigger picture is moving toward a healthier, less wasteful, and more self-sustaining lifestyle.  Recently I’ve become aware of this “back to the land” movement known as modern homesteading and I want in!  Do I plan on working a 30 acre farm, stockpiling absolutely everything in a massive basement, and dressing like the Amish?  NO!  Target and I are still very good friends but in practical terms, for us, modern homesteading is growing as much of our own fruits and vegetables as we can, not letting anything that can be used go to waste, being more conscientious about our environmental impact, and stewarding our resources responsibly.

If any of that interests you I hope you’ll come on this journey of discovery with me and that my information and advice will help you along the way!  Post hesitate to comment or question if there is any other way I could help.

Greg the Garlic

If you follow my Instagram you might already know that I’ve decided to name my windowsill garlic plant.  His name is Greg the Garlic and today he was finally potted in his new home!

It has been an incredible self-confidence boost to watch my little garlic sprout and grow and sprout some more!  It feels so good to actually have my garden started even if it is just a few baby garlic plants in my kitchen.

For the past week or so I’ve kept Greg in a little dish with just enough water to keep the bottom wet.  I’ve never “planted” plants in water before so I wasn’t sure how much he’d actually need.  Whenever the bottom of the dish got dry I’d add a bit more and that seems to have done the trick because this little garlic has sprung up like a weed!  Greg has gotten so big in fact, I felt it was time to get a few of the more mature cloves in some dirt.

In my first year of college I took an environmental science course that taught us practical means of living more sustainably and leaving a smaller footprint on our planet.  Since that time it’s always been in the back of my mind – the desire for a healthier, less wasteful lifestyle – but between getting married, going to school, having this job then that job, and moving to another state, my desires just never came to fruition.  However, now that I have more time on my hands and after everything I’m learning about gardening, it is the perfect time to start!

compost

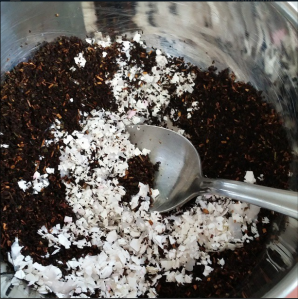
It might not seem like much, only two used K-cups, three old tea bags, and a few egg shells but this tiny soil booster is already reducing waste that would have ended in the trash and then some anonymous landfill.  I would have added this to some dirt from out-back but seeing as our yard is covered in about three inches of steadily falling snow… I bought potting mix and juiced it up with extra calcium from the egg shells and nitrogen from the coffee and tea.

Next, it’s time to find some pots!  I’ve learned so much about apartment gardening and alternative containers that I wanted to put my new knowledge to good use. juicepots After scrounging through our recycling I found three perfect candidates.  I cut in half two old juice bottles and poked holes in them for drainage.  Then I cut one side from a grapefruit juice carton to make a tray to catch the water.  I put one coffee filter in the bottom of each of my “pots” to help hold in moisture and soil.

Finally, I filled my pots with dirt and chose a few of the taller cloves that had already broken away from the head to plant.  Sprinkle with some water and voila! A recycled, windowsill container garden for my garlic babies!

potted

Compost Here We Come!

When I was little composting meant dumping all our vegetable and fruit leftovers in a big heap in the farthest back corner of the yard where my grandfather would also burn the trash.  What my grandparents ever did with that smelly mess I never thought to ask.  I have personally never composted or even thought of the possibility of composting but as I am getting deeper into the world of gardening and homesteading I’m asking myself – why not?

Composting helps plants to grow bigger and healthier.   It adds organic material back into the soil which in turn helps the soil to retains more water and nutrients.  It also saves you the hassle (and money!) of driving down to Home Depot for mulch or other gardening soil additives.  Tired of bagging up sacks of dead leaves in the fall?  No problem.  Add those to your compost heap too for a carbon boost!  Also, yard and garden waste makes up 20% of all household waste (and that isn’t even counting vegetable/fruit peelings and paper products which can all be composted) so choosing to compost will stop that organic material from being buried in a landfill and can increase the quality of your topsoil.  Check out this graph detailing the average amounts of refuse compiling our waste:

Need I say more?  Composting is good for (a) the environment, (b) your garden, (c) your wallet!, and did I mention (d) can help lead you into a healthier lifestyle.  During an interview about vermicomposting, my friend Elyse mentioned that composting has made her more conscious about not only the amount but type of waste her family is producing.  Being conscious can make us conscientious.  Elyse, for example, is striving to waste less and eat more organically as vermicomposting involves using worms to do the “recycling” for you; meaning they eat what she eats and their diet is in turn feeding her plants.

Once you’ve been persuaded by the incredible benefits of composting it’s time to decide what style of composting would fit your lifestyle and gardening needs best.  I’ve since learned that the composting practices of my grandparents’ are called cold composting: allowing the natural process of decomposition to slowly recycle organic materials into rich soil.  The benefit of cold composting is energy.  It requires the least tending and aside from occasionally turning the pile with a fork or shovel, you literally just throw your waste into a pile and let mother nature take its course.  However, this type of composting also requires the most time.  So if you don’t have the energy to tend your compost but plenty of time to wait, cold composting isn’t a bad choice for you.

On the other hand, if you are short on time and willing to put in the effort, hot composting can turn waste into fertile soil in as little as 18 days.  Hot composting involves adding a certain ratio of ingredients to temper your carbon and nitrogen levels.  Also, like the name suggests, hot composting uses heat to speed up the break down of particles.  Materials high in nitrogen are known as “green materials” and usually include anything green or living, ex. green leaves.  “Brown materials”, on the other hand, are high in carbon and general include anything brown or dead, ex. brown leaves.  I can’t attest to how difficult this type of composting is because I’ve never tried it but since this is my first time, I’m going to try my hand at cold composting first.  If you are interested in learning to hot compost here is a link that promises rich compost in 18 days.

The third type of composting is vermicomposting which uses live worms to break down materials for you.  If you haven’t read the interview my amazingly cool and seriously talented friend Elyse gave about her vermicomposting then I HIGHLY recommend it!  She, and plenty of others, have shared that a small bin of vermicomposting worms (yup, worms!) can fit easily in any available nook.  While our interview absolutely gave me the desire to go adopt a few 1,000 wriggling new pets, I’ve still got my hands quite full with my own wriggling little one.

Since I don’t think our landlord would appreciate carrot peelings and onion skins piling up in the back yard, or the furry critters they’d entice, I am going to start out small.  I haven’t decided whether I want to hot or cold compost yet but I am planning on starting out in a 5 gallon bucket (with a lid to thwart would-be-thieving animals!).  After doing all this research I’ve become very aware every time I put vegetables peels and cuttings in the trash and it feels so wasteful!  Hopefully we can head out soon to pick up a bucket so I can get a head start for my garden.

If you are considering or have decided to compost here is a list of compostable materials and (for you hot composters) whether they will add nitrogen or carbon to you pile.

Green Compost Materials – Nitrogen Rich

  • raw fruits and vegetables
  • green grass clippings and leaves
  • tea bags, coffee grounds and filters
  • egg shells (also high in calcium!)

Brown Compost Materials – Carbon Rich

  • brown leaves and grass clippings
  • dryer lint
  • paper towels and newspapers (shred before adding)
  • bark
  • wood chips and saw dust

Do Not Compost

  • diseased plants
  • weeds
  • meat and dairy products
  • oil, grease, or fat
  • wood ash
  • dog/cat feces
  • bones

I also wouldn’t compost any type of glossy or treated paper.  Meat actually can be composted but it requires a special type of machine composter and enough land to house it miles from anything with a nose because it smells like Hades with athlete’s foot!

For everything else you could care to know about composting check out this nifty pdf, organiclifestyles, which also talks about how to keep pests and rodents away and a trouble shooting guide if you run into some problems.

Vermiqueen Tells All!

Wow!!  Have I got a treat for you guys!  My dear friend Elyse, aka the Vermi-Queen, has given me an incredible interview about her experience and advice on vermicomposting, gardening, and urban homesteading.  This woman is a powerhouse and I’m always being inspired by the risks, adventures, and new undertakings she commits herself too.  While I could go on about her rock star rollerderby, insane home brewery, or educational altruism – today we are talking…

WORMS!

Red wrigglers to be specific as they are Elyse’s slimy pet of choice.

In bold are my questions

In italics are her answers
Enjoy!


What is vermi-composting?

Vermicomposting involves taking leftovers (normally scraps and trash) and having the worms break down the food. This results in a soil like fertilizer.

Can you briefly explain the process of vermicomposting?

In our home we try to minimize our waste or reuse it in the best way. Vermicomposting is just simply composting with worms. Of course this has more restrictions than normally composting. Some items aren’t worm friendly and can cause the bin to become unlivable (potatoes peels, onions, anything with high acid content). The worms will attempt to flee or will die. 😦
(Awe!! Poor little sweaty worms)

How did you hear about it?

A really close friend was composting in her tiny apartment on the north side. I was pretty much hooked into it by her offering me some worms. She gave me a few tips and I put them in a box in my tiny 1 bedroom apartment closet. A year later I still had those worms and a better appreciation for them.

Why did you decide to vermicompost as opposed to other types?

Vermicomposting isn’t cheap (initial worms cost) but I found it to have faster results. My compost has gotten better over the years. 3+ years later I find that my fertilizer is more effective and can revive nearly dying plants. We also make attempts to eat healthier. We are organic food junkies and I try to make my compost as organic as possible.

How much space do you use in your house to vermicompost and how much space would the average novice gardener need if he/she wanted to start v-composting?

I started composting in a storage tote. You can start as small as you want. I just keep in mind that an average month of waste in our home amounts to 3-8 pounds worth of items. These items range from paper towel inserts, shredded paper/newspapers, cooking scraps, dog hair, dryer lint, etc. It may be more depending on if we have guests. You should always start out small and I highly recommend totes (drill holes in top for air). I’ve put my tote in the kitchen, closets, underneath my computer desk. It is really accommodating to apartments. I now have a commercial composter (Worm Factory 360). It is PERFECT for small spaces but could use some improvements. I’ve made minor adjustments to make it more user friendly.

How much did it cost to start v-composting?  Looking back, do you see any ways you could have saved money starting out?  What do you think the average cost would be for a beginner gardener to start a small v-composting bin?

My initial cost in composting was $0. I got the worms for free from a friend and I had a spare tote. If you are starting from scratch worms (1000+) can range from $29 and up. My favorite retailer is Uncle Jim’s for my worms. There is usually a coupon available and at least saves you shipping. A standard tote at Walmart can cost $4 and up. If you are interested in composting I would suggest doing a 2-3 collection of items to jumpstart your compost. Peat Moss, lint, and shredded paper are great to start off with.

How many worms did you start out with and how many do you have now?

I initially started out with a small container of worms (I never counted) and then I added about a 1000 worms to my farm. Unfortunately in the first year of my composting I had to restart after adding spent grains from brewing to my tote. It caused massive overheating (95+ degrees) and about 80% of my worms died. I rehabbed what I could, threw out my compost, restarted with the worms I had plus 5000 more. 2 years later my worm farm is thriving. I don’t know the exact amount but every bin is filled with happy worms.

What is the worms’ enclosure like?

A worm factory 360 has stackable trays. The inside of the trays have holes for them to navigate between bins. The very bottom is a reservoir with a tap handle to capture moisture and the natural “tea” made from the heat in the bin. This is a quick and easy way to get “worm tea” without the brewing process.

worms
Worm Farm 360

Are worms demanding pets?  Is it difficult to keep them alive?  How often do you have to feed them?  Do your worms have babies?

Worms are demanding in the initial start of composting (2-4 weeks) after not so much. I typically feed them in rotations of 4 weeks with a 2 period “dry” period to encourage them to get their feast on. I collect food for long periods of time then fill the other bins. I don’t want to stack too much at once or the bins will never really be fully composted.

I probably should have mentioned early that not all worms are created equal in the compost world. In my compost I use red wigglers (Eisenia foetida). I know that other websites have stated that you can use white worms or earthworms. I personally cannot attest to the success with other worms but I am sure that it works. Some worms are better for hydroponic systems and others are better for composting. Red Wigglers are hermaphroditic (male and female). In all my reading in books it seems that reproduction still happens between two sexually mature worms. You can tell they are sexually mature by the bands (rings) on their tail end. The cocoons are easy to spot. At first I thought I had a termite issue but come to find out it was just worm cocoons! It is amazing to see.
(Happy worm mommies and daddies… and mommy-daddy’s apparently)

Do your worms smell?

The worms themselves don’t have a smell. What they produce does in the rare occasion. If the smell in the bin gets too excessive you may have issues with the composting items.

What do you feed your worms and what are some things you should never feed a worm?

In the past year I’ve spent more time trying to have an organic compost. This is easier said than done (thanks wallet). My normal compost consists of food scraps (banana peels, outside of apples, spoiled leafy greens), shredded paper, and spent grains from our home brewing. I would never feed my worms anything too acidic (though they WILL eat apples) onions, meat or dairy.

Can you briefly describe the process of making your composting tea?

This past year I’ve experimented with this to the best of my ability. I would like to credit the Pennsylvania Department of Environmental Protection for my process because I use the one on their website! 

Why do you turn your soil into gardening teaWhat are the benefits and who should do likewise?

I cannot back up my gardening tea as scientifically solid. I can say that it has made my garden better! Other online composters will swear by it as well. I know that I use mine as a spray to protect the leaves against insects. I also use it to water the soil directly. The soil in our yard is hard clay. This year we will be investing into other ways to supplement our lack of soil. I can’t produce enough fertilizer to actually grow but I do like to use it to “jump start” our seeding.

How has v-composting impacted your lifestyle?

I believe that composting has made me more mindful of the waste I produce.

Any advice for people considering v-composting?

DO IT! Don’t get freaked out by the worms. They will not crawl out and hunt you down in your house. Research before you invest. It is a commitment and I take it seriously.

What do you see as the future of your v-composting?

I’m hoping to branch out and do community composting. You hear about it all the time in other states that have communities that take pride in urban homesteading. I would like to start with my own neighborhood and have a collection base at my home. In return for waste residents can come and buy back the fertilizer at little to no cost.  I would also like to branch out and do larger scale composting or try out a hydroponics set up.

What are you currently growing in your garden?

Weeds! HAHA Right now nothing is growing but we will begin prepping for it after we begin our bee hive set up!

Do you see a noticeable difference in plant health and crop yield from using your composting tea?

I notice that the leaves are not eaten up or frail. It may be a bug repellent (not sure) but a lot of my plants look healthier and some will yield more. We had a fantastic pepper harvest 2 seasons ago and this past we just struggled with weather and soil issues.

Any general gardening advice for first time gardeners?

Start small. The first items I ever grew were herbs. Potatoes, herbs, and leafy greens are a starting gardener’s best friend!


I hope all my readers enjoyed this interview as much as I did!  As always, Elyse never fails to educate and inspire and if you are as excited about worms as we are maybe you’ll pick up a few thousand and start your own worm farm.

… I wonder if worms qualify as an acceptable “pet” on my apartment lease….


Why is she the vermiqueen?  Because her experience and crazy experiments in the world of worms makes her the expert!  Hoping for a come back of that sweet Vermiqueen Tea for retail in the Indianapolis area this summer?  Follow my blog, More Than Mommy, and you’ll be the first to know!

Garlic Baby Update!

This is an update to my Adventures in Garlic.

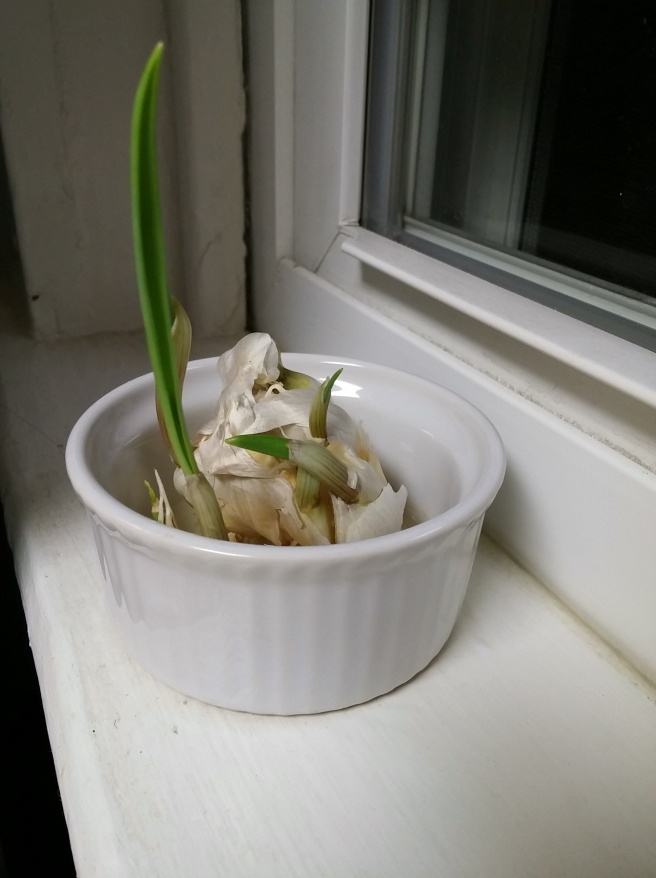
A little over a week ago I went to chop some garlic when I found out my store bought head had started sprouting!  I’ve eaten sprouted garlic before but never when it’s been this far along:

garlic

Not that there is anything wrong with eating it like this.  Just snip off those seeking little green fingers and enjoy yourself some wholesome garlic.  But since I am starting this journey to a more sustainable me and learning everything I can about gardening on the way, I thought it would be an invaluable opportunity to test out my apartment gardening prowess!

I checked my sources and have been recommended to plant garlic in the mid-fall to early spring.  (I went outside last week to dig up some soil to plant it indoors and the ground was like flaky, brown cement.)  This guy, however, is going to hang out in my kitchen for a while.  If I were planting in soil then I’d break apart the individual cloves, leaving the skin as intact as possible and plop each one in its own cozy plot.

Now, since I can’t plant, or dig outside and my lazy bum hasn’t been round to Home Depot for some potting soil, our friend is sitting pretty in a ceramic dish on my windowsill in a little pool of water.

One article I read suggested submerging my guy in a mixture of vinegar water as well as a handful of other odd steps but given the promising growth and pungent garlic odour, I think he’s quite happy where he is! 🙂

Here is a picture of my garlic baby:

garlicc

In the spring I’ll plant it in direct sun but for now I’m keeping my garlic in a ceramic dish with just a touch of water.  I’m not sure how much water it needs but I check it everyday to make sure the bottom of the dish is atleast still wet.  After soaking up the first bit of water I gave it there was a yellow gell-yish goo under the garlic.  I was a little concerned but that beautiful growing sprout has calmed my nerves!  I’m so happy with my progress and can’t wait to plant it!!!